0
0
WoW Classic SoD Sunken Temple Raid Guide: New Weekly Boss
- Cheryl
- Share
- WoW Classic SoD
- 04/12/24
- 2595

The Sunken Temple Raid has come to be a regular challenge for the players who wish to test their strengths against its dynamic weekly bosses and unique mechanics. Our guide offers essential strategies that will help you in moving through these encounters of the raid including the new weekly boss Atal’Alarion, Festering Rotslime and The Atal’ai Defenders.
- New Weekly Boss
- Atal'Alarion
- Festering Rotslime
- Defenders
- Dreamscythe & Weaver
- Ogom & Jammal
- Hazzas & Morphaz
- Eranikus Encounter
- Avatar of Hakkar
↖ New Weekly Boss
The Sunken Temple Raid brings in a new boss every week with different mechanics. It is important to know these mechanics well if you want to clear successfully. This manual therefore draws its experience from multiple clears both pre-nerf as well as post-nerf which guarantees that it has current raiding advice that is useful for players.
↖ Atal'Alarion
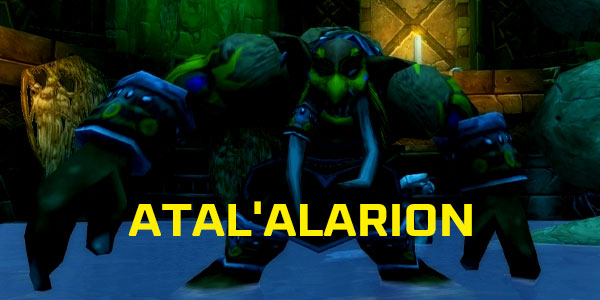
- Tanks: Can be handled by one or two tanks.
- Pillar of Might: It spawns pillars that give strength to the boss.
- Demolishing Smash: This is a knockback mechanic; position yourself in order to be knocked into pillars so as to nullify them.
- Pillar Cleansing: Players who have been knocked cleanse pillars; pillars grant line-of-sight (LoS).
- Knockback Mitigation: Rogues can vanish; other classes can use Limited Invulnerability Potions (LIPs); Paladins can Blessing of Protection (BoP) for immunity.
- Threat Drop: Tanks are launched up into the air –the off-tank should taunt or allow main tank land back on ground.
↖ Festering Rotslime
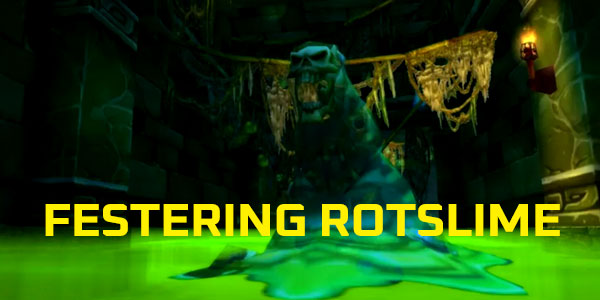
- Gunk Debuff: Slows movement by 75% and deals nature damage; produces harmful goo when removed.
- Positioning: Stand on the edges of hallways for goo placement management.
- Objectives: Destroy side objects to slow the boss upon collection; after five, it casts an AoE and expels objects.
- DPS Phases: Focus DPS on the boss when stationary; melee may stand in front or inside the boss with water breathing.
↖ Defenders
The Defenders encounter is a series of sequential boss fights against 6 different bosses, each with their own abilities. The order they come in changes from week to week, and once beat, the boss returns as a ghost which can be controlled forever.

Key Mechanics:
| Mijan | Melee attackers should dispel Thorns to avoid damaging themselves. |
| Zul | Charges and AOE slams that knockback. |
| Zulo | Uses Chain Lightning which has to be interrupted. |
| Gasher | Calls AoE axes and melee haste buff getting more attack speed. |
| Loro | Aoe disarm and threat reset. |
| Hukku | Interruptible Shadowbolt Volley and cleave damage adds are summoned by him. |
Strategy:
- Focus on one boss at a time while controlling the ghosts of the defeated bosses.
- Manage ghosts by using crowd control methods like shackles or hunter traps.
- Pay attention to Thorns of Mijan and get rid of them quickly
- Interrupt Zulos Chain Lightning as well as Hukkus Shadowbolt Volley
- To avoid knockbacks from zul keep spatial awareness
- Control his hit frequency to manage gashers hasterbuff
- Be ready for Loro's threat reset so he retains tank control.
↖ Dreamscythe & Weaver
This fight involves three phases and requires handling two dragons with a shared health pool.
| Phase 1 (Dreamscythe Active) | From 100%-80% HP |
| Phase 2 (Weaver Active) | From 80%-60% HP |
| Phase 3 (Both Dragons Active) | From 60%-0% HP |
Abilities:
- Wing Buffet, knocks players back aiming to make them stand in center of room not close combats.
- Frontal Breath, Poisons damage; two stacks shouldn't surpass the tanks.
Strategy:
- To reduce the shared health pool quickly, damage either dragon.
- Stand behind the dragons at all times for protection against frontal breath attacks.
- Use a tank rotation system to manage the poison debuff stacks.
- In phase three expect knockbacks, with Dreamscythe always initiating first.
↖ Ogom & Jammal

Weekly Rotation:
- The boss to kill at first in each week's encounter changes from one week to the other.
- Adjust strategies based on which boss needs to be defeated the previous week.
Phase 1 (Defeating Ogom First):
- A DoT heavy similar to Shadow Word: Pain is thrown by Jammal'an onto 10 players requiring dispels.
- Keep stacking and moving like in Phase one for Holy Novas.
- Expect an AoE fear; melee must move out of range when it is cast, while others dispel themselves if affected
- Mass Penance does AoE damage after a Power Word: Shield on Jammal'an. To mitigate this, purge or dispel the shield
Phase 2 (Defeating Jammal'an First):
- Ogom will do a combined spell casting of Divine Storm, Consecrate, and Hammer of Justice that are all area effect based spells
- Avoid Consecrate quickly by running far away from it before being damaged
- Stuns caused by Hammer of Justice can be countered with Free Action Potions
Key Points:
- Cleanse debuffs immediately upon application.
- Execute fear avoidance plus making use of dispelling techniques.
- Prevent Mass Penance damage by purging shields
- Free Action Potions are used against Hammer of Justice.
↖ Hazzas & Morphaz
| Phase 1 (0-80% Health) |
|
| Phase 2 (80% Health) |
|
| Burn Phase (30% Health) |
|
| Additional Notes |
|
↖ Eranikus Encounter
Challenging, Eranikus is a tough boss inside the Sunken Temple raid, requiring accurate execution and awareness from the whole raid group. Positioning, timely dispels, and strategic movement are all key in this three-phase encounter.
Phase Mechanics:
- Corrosive Breath: An attack that reduces tank armor by 33% when he faces them. Previously necessitated a tank swap but may no longer require one.
- Tail Swipe: Stay out of range behind Eranikus to avoid knockback.
- Deep Slumber: Produces wisp pods that stun for 15 seconds upon contact—only enter during Waking Nightmares to avoid a raid wipe.
- Bellowing Roar: It can be interrupted or slowed with Curse of Tongues as an AoE fear spell.
- Lethargic Poison: In addition to dealing damage over time, it also reduces hit chance by 50% and increases mana costs on the target affected by it. Must be cleansed promptly.
Phase Transitions:
- At 70% health, two Lumbering Dreamwalkers are summoned by Eranikus and six Whelps are spawned every 8 seconds afterwards. Deal with adds using AoE or cleave while also managing ongoing mechanics.
- At 30% health, two more Dreamwalkers appear followed by Nightmare Scalebanes casting Acid Rain. Spread out to avoid damage and continue managing all previous mechanics.
- At 10% health, Eranikus enters a soft enrage phase spawning multiple adds that need to be slowed down or controlled while burning the boss.
↖ Avatar of Hakkar

Sunken Temple's last boss Avatar of Hakkar can only be engaged after completing Egg of Hakkar quest line. The fight will involve managing adds and positioning to mitigate damage from different abilities used.
Key Mechanics:
| Holy Novas | These remain stationary during the fight and are cast by dragon adds. Move as a group to avoid. |
| Blue Debuff | If you are melee, get out of the group to prevent the spreading of an explosive curse. |
| Mana Drain on Adds | Damage dealt on the adds counts towards the boss' health beneficial for reducing overall fight time. |
| Mind Control (MC) | Purge or dispel quickly, or move out of the raid to prevent AoE damage to allies. |
| Corrupting Blood | Players affected by this should leave immediately so as not to spread it further in their group. |
| Skeletal Form | The boss absorbs Corrupting Blood making it unhealable for 5 seconds. When hit by it tanks should use cooldowns. |
| Blood Nova | This can be mitigated by managing Corrupting Blood effectively. |
Through following strategies outlined individually for each encounter in Sunken Temple Raid, players can optimize their approach and overcome all obstacles presented herein. Note that adaptability and coordination is key when it comes to dealing with these foes. You have now been armed with this guide which will walk you through winning over your fears and rising from its depths successfully.
Most Popular Posts
- WoW Classic SoD Gold Farming: Top 7 Best Locations in Phase 2
- Season of Discovery Phase 2 Hunter BiS Guide: Best Gear Pick
- Season of Discovery Phase 2: In-Depth Class Tier List Analysis
- WoW Classic SoD Phase 3: Definitive Class Tier List
- How Do I Make Gold Fast in Season of Discovery?
- WoW Classic SoD Sunken Temple Raid Guide: New Weekly Boss
Popular Category Lists
- WoW Classic SoD / (41)
- WOW Classic / (1)